
Table of Contents
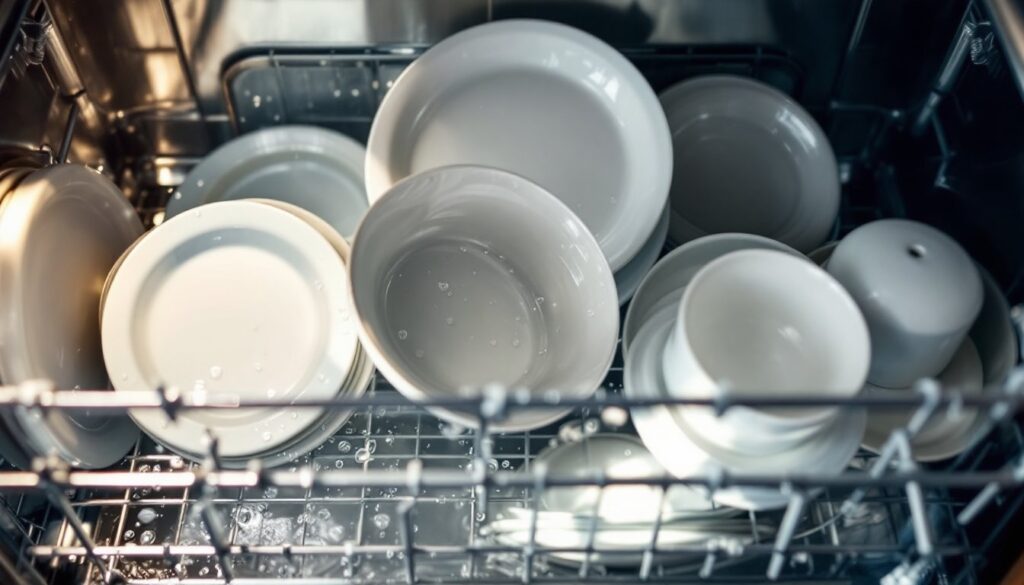
ToggleA Whirlpool dishwasher that leaves dishes wet is frustrating, and surprisingly common. The dishes look clean, but when you open the door, you’re greeted with standing water and dampness instead of that satisfying dry finish. Before you call a service technician, there are several straightforward troubleshooting steps you can take yourself. Most drying issues stem from simple fixes: rinse aid levels, cycle settings, or basic maintenance. This guide walks you through the most common causes and how to resolve them, potentially saving you a service call and getting your dishes dry again.
Key Takeaways
- Start by checking your rinse aid dispenser and refilling it if empty—this is the most common cause of a Whirlpool dishwasher not drying and often resolves the issue immediately.
- Inspect the heating element for mineral deposits or damage and clean it with white vinegar if crusted; a cracked element requires professional replacement.
- Verify you’re using Heat Dry mode instead of Air Dry, as the latter relies only on residual heat and leaves dishes damp.
- Clean door seals, vents, and spray arms to ensure moisture can escape and air circulates freely inside the cabinet.
- If troubleshooting doesn’t work, document your steps and model number before calling a technician—a service call costs $100–$200 and is usually more economical than replacement for units under 10 years old.
Check the Rinse Aid and Dispenser
Rinse aid is the unsung hero of dishwasher drying. This chemical additive reduces water’s surface tension, allowing it to sheet off dishes rather than forming beads that trap moisture. If your Whirlpool dishwasher isn’t drying properly, the first place to look is your rinse aid dispenser.
Open your dishwasher door and locate the dispenser cap on the interior wall, usually on the side or top of the tub. It looks like a small white or gray dial. Twist it counterclockwise to open and check the fluid level. If it’s empty or low, that’s likely your culprit. Fill it with commercial rinse aid until the indicator shows full, then close and twist clockwise until snug.
Once you’ve refilled it, run a normal wash cycle and observe the drying performance. Many homeowners notice improvement immediately. But, if you’ve recently refilled the dispenser and drying still isn’t working, the dispenser mechanism itself may be stuck or malfunctioning. Soak the dispenser cap in warm water for 15–20 minutes to dissolve any mineral deposits, then gently scrub with an old toothbrush. Rinse thoroughly before reinstalling. Hard water minerals commonly clog the small opening that releases rinse aid, so this simple cleaning often restores function.
Inspect the Heating Element
Your Whirlpool’s heating element is what actually dries the dishes, it raises the water temperature and warms the cabinet during the final dry phase. If this element fails or becomes partially blocked, you’ll get wet dishes every time. To inspect it, you’ll need to access the dishwasher’s interior components, which means killing power first. Flip the breaker dedicated to the dishwasher or unplug it if it’s on a plug-in outlet.
On most Whirlpool models, the heating element sits near the bottom of the tub. Open the door fully and look for a metal tube or coil along the lower basin, it’s usually visible on one side. Carefully run your fingers along it (make sure it’s cool) or use a flashlight to check for mineral buildup or sediment. Hard water deposits can insulate the element, preventing it from heating effectively.
If the element looks crusted with white or tan deposits, fill a shallow pan with white vinegar and position it inside the empty dishwasher. Run a short rinse cycle to circulate the vinegar and help dissolve mineral buildup. This inexpensive fix sometimes restores heating performance. If the element is visibly cracked, darkened, or burned, it needs replacement, this is a part you can order and swap yourself if you’re handy, but it requires removing the lower spray arm and tub panel. If you’re uncertain about DIY element replacement, this is a reasonable time to call a technician.
Verify the Dry Cycle Settings
Your Whirlpool may have multiple drying options, and choosing the wrong one can leave dishes damp. Modern dishwashers distinguish between Heat Dry and Air Dry modes, and understanding the difference is key.
Heat Dry vs. Air Dry Modes
Heat Dry is the standard, energy-intensive mode that uses the heating element to warm the cabinet during the final phase, ensuring thorough drying. This is what most homeowners expect when they close the door, dishes come out completely dry. If your model offers a Heat Dry option and it’s not selected, that’s an easy fix. Simply choose Heat Dry the next cycle and monitor results.
Air Dry (sometimes called Energy Saver Dry) skips the heating phase and relies on residual heat and airflow to evaporate moisture. It uses less energy but leaves dishes slightly damp, especially plastics and glasses. If you’ve accidentally switched to Air Dry mode and wondered why your dishes aren’t drying, you’ve found your answer.
Check your control panel, many Whirlpool models have a dial or buttons labeled “Dry Options” or “Drying.” Consult your owner’s manual for your specific model’s drying selections. If Heat Dry is already selected and the dishwasher still isn’t drying, move on to the next troubleshooting steps. You can reference general dishwasher drying issues and solutions to understand how these cycles function across different brands.
Clean the Door Seals and Vents
Moisture can’t escape if your door seals and vents are blocked or dirty. A compromised seal traps steam inside, which then condenses on dishes, leaving them wet. Grab a damp cloth and inspect the rubber gasket around the door’s inner edge, this seal prevents water from leaking during the wash cycle, but it also traps humidity if it’s not tight.
Wipe the entire gasket clean with a damp cloth, then dry it. Check for visible cracks, splits, or hardening. If the rubber is brittle or visibly damaged, it likely needs replacement, but first confirm the seal is free of food debris or mineral deposits that might prevent it from closing properly.
Next, locate the vent or vent opening, this is usually a slit or opening along the top or side of the inner door. This opening allows steam to escape during the dry cycle. If lint, food particles, or mineral deposits block it, steam can’t evacuate and dishes stay wet. Use a soft brush or old toothbrush to gently clear any visible debris from the vent opening. A damp cloth works for stubborn mineral buildup. Some Whirlpool models have a removable vent cover: if yours does, pop it off, clean it, and reinstall. This is a quick fix that pays off immediately in many cases.
Check for Blocked Air Circulation
Air circulation inside the cabinet is essential for evaporating moisture from dishes. If the interior is cramped or racks are loaded incorrectly, air can’t move freely and drying suffers. Empty your dishwasher completely and examine the lower rack area, where the spray arm rotates and where hot air should rise.
Make sure the lower spray arm spins freely without hitting dishes or the rack. If it’s stuck or rubbing, reposition dishes in the lower rack, tall items should go in the upper rack, leaving the lower area open for air movement and spray coverage. Also check that the upper spray arm isn’t blocked: this arm should rotate without obstruction.
Look at the sides and back of the tub for a small opening or vent, this is where air circulates during drying. If lint, food particles, or mineral deposits clog this area, airflow drops significantly. Use a flashlight to inspect and gently brush away debris. Hard water deposits here are common, especially if you don’t use rinse aid regularly. A vinegar soak or brief cycle with vinegar can help clear mineral buildup in circulation pathways, restoring air movement and drying performance.
When to Call a Professional
If you’ve worked through the steps above and your Whirlpool dishwasher is still not drying dishes, you’ve likely narrowed it down to internal components that require professional diagnosis. Common culprits at this point include a failed heating element, a faulty drying fan, a broken thermostat, or wiring issues, all of which require tools, parts knowledge, and sometimes manufacturer diagnostics to resolve safely.
Before you schedule a service call, confirm your dishwasher’s model number (usually on a sticker inside the door frame) and document what you’ve already checked. This helps the technician diagnose faster and prevents redundant troubleshooting. A standard service call typically costs $100–$200 in labor, plus parts if needed. Compared to replacing a $400–$800 dishwasher, a service call is usually the smart move, especially if your unit is under 10 years old.
If your dishwasher is older and repair costs approach 50% of replacement value, it may be time to invest in a new model. Resources like Good Housekeeping offer tested product reviews and buying guides to help you choose a reliable replacement if repair isn’t practical. For hands-on troubleshooting or DIY component replacement, Popular Mechanics provides detailed repair guides and technique tutorials that can guide you through more advanced diagnostics if you’re confident in your skills.